Wednesday, July 9, 2014

Oldies

I recently rediscovered some old craft projects and such that I thought I'd share here..


Toilet paper tubes. Scissors. Glue. Let's see what happens!


I like where this is going!


Think of all the fun color schemes you could do for a nursery or something!

My second project I'll post is a fun canvas/lace project.


Lay the lace over the canvas, tape it down on the back if needed. Spray paint color of your choosing. Let it dry, take the lace off, and voila!! Think of what lovely art pieces you could make with this? I believe I feel a new inspiration brewing!


That's all for today folks, catcha later!

Wednesday, June 11, 2014

Simplicity

Today's refashion is short, sweet, simple, and wasn't for me! It's for my little sis! (The following pictures are indeed her and not me, everyone says we look sooooo much alike... said resemblance I have simply never seen, but whatever.. it's her.)


She didn't like the lacy collar. She always tucked it in and wore a scarf over it, but I said I could fix it for her! (Btw, doesn't she look disgustingly fab in her makeupless, youthful self? I hate her.)


Chop chop. And ruh roh.


Lookie, I can fix it!!!!!! It's not cheating if it works right? I tried a seam ripper, but ended up ripping, well, seams, and I didn't feel like sewing them back together.


Ta da!!!!! Look, good as new, you can't even tell! You also can't tell where I dropped the sharpie on my light colored couch and left an eensy weensy mark... Moving on...


Here she is, glamming it up. So gorgeous. I shoulda taken a pic of the back, it's got white buttons down the back, so cute!!!


I love it when it's simple and easy to fix!

Wednesday, June 4, 2014

Pinspirations!

Hello beautifuls!

I would like to announce that I started and completed a craft project within an hour (if you don't count taking a break to cook and eat lunch), AND I'm thrilled with the results! This may be a first for me! I've seen so many takes of the jewelry board on Pinterest, you know the kind, DIY corkboard, most of the time with some sort of horrific Chevron fabric? (I will probably never like Chevron.) Well they never really appealed to me, quite possibly because of the Chevron, and I just never saw the potential. Or maybe I'm a bit on the traditional side when it comes to jewelry storage. Either way, that all changed when I saw a friend's jewelry board when I was visiting the other day. I'm pretty sure she made hers too, and voila, Pinspiration struck! So I marched over to Hob Lob at the first chance, now that I can totally get their coupons via mobile phone rather than printing and cutting at home.. so convenient. While I'm there, hubs, who happened to be with me, told me he already had a small corkboard at the house, so I decided it might be VERY smart to test my DIY skills on some free stuff first. Genius!
This is today's craft project. Shall we begin?

Hello, my name is Heather I-like-to-do-everything-the-hard-way. There, now that that's out of the way...


Do you remember my hot pink skirt that I 'salvaged' from a really pretty semi-formal?


I ended up turning it into this ^, and never wearing it because it wasn't made properly and I couldn't figure out how to fix it. Well I found a scrap of it in my scrap basket, and decided I might as well put the pink gorgeousness to usable use. 


I could have measured and then cut the fabric properly, but that'd be WAY too easy. Remember my name? So I cut around the board. At least I didn't make the mistake of cutting it too small. 


Now that I think about it, it probably would have looked nice if I'd glued it on like that, but whatever. As you can see, I needed to trim. Trim I did.


This wonderful round cloth cutter (there's an actual name for it) didn't cut for sour apples. Probably just the type of fabric. (I hope). It did make a nice line where it needed to be cut, so I pulled out the scissors and cut it the old fashioned way.


This is what happened ^. All around the inside edge here and there. But I did not despair. You see that hint of blue poking out from underneath it? I had an idea!


Thank the Lord for hot glue guns!!! Much as I love Mod Podge, I wasn't sure it was the glue for this job.

True to form, I did NOT measure properly when trimming that ribbon, and didn't realize til it was kinda too late that I didn't have quite enough. Fortunately I was able to hide the short ends underneath the longer ends (makes perfect sense huh?), and salvaged everything beautifully! (Just ignore the drop of hot glue that landed on the pink fabric, making me howl in frustration until I realized I could easily cover it up with the jewelry.. pretend that didn't happen, k?)


Here it is!!!!! I love it!!!!! The board is 11x17, not nearly large enough for my jewelry collection, but perfect for watches and bracelets! (I don't think I own any real jewelry besides my wedding ring, haha..) So now that I've had a relatively good first run through, I will be planning out a much larger board for the rest of my Charming Charlie collection!

Update: I discovered today (two days later) that I pinned all my jewelry on this board upside down. The two hooks are on the bottom of the board, which means I need to repin and relocate all the jewelry so I can turn it right side up to hang it. The only reason this is really an issue is because the pins and fabric combination of this project leaves unsightly holes. Grrr. I may just skip it and put a new clip on the back of the board so I don't have to re-arrange anything.)

What is your latest Pinspiration?

Sunday, May 4, 2014

Paint and Yarn

I've had this project sitting around for several months, completed. I didn't post it because it was a gift. I was finally able to give it yesterday, it's a blankie for my niecey-poo Lorelei, who will grace us with her presence sometime next month! I love this one, and am tempted to make something similar for myself!


It took about two months to make (mostly because I greatly underestimated how much yarn I needed.. several times.) I wanted a spring flowers theme. Perfect for a little girl!!

My next project was something I started and actually completed on the same night! Thank you Pinterest for the inspiration!


This was tons and tons of fun to do! I started running out of ideas after awhile, but managed to squeeze a good bit of variety in for each section. My favorites are the yellow and pink circles, and the pink and white swirlies next to it. I hung it in the bathroom for now, I don't think it'll stay there though.

You've seen this fish before.

It's such a wonderful feeling to finish an art project and love it, as opposed to saying, 'well, I tried anyway.' 

Sunday, April 27, 2014

Another $1 Refashion!!

Hi lovelies!

I haven't posted in forever, I've been lazy! Well actually I've been very busy with our church's annual Passion Play. I love acting, but it does drain you! So I started the week after Passion Play with a new refash! Straight from the mountains of North Carolina, I found this in a boutique called 'Dollar General'. ;D Originally $15, but it was end of season clearance, down to $1! (I'm wearing a black tank top underneath).


Size 3X. I was certain I could do something nice with it. Very simple, just take it in. And surprisingly enough, it WAS simple, once I finally got around to doing it. (I bought it on Halloween of last year ya'll..) The only minor difficulty I had was taking it in under my arms where it fit properly, but even after I took it in once, all I had to do was take it in a little more on each side, and it was a done deal! Elastic waist, stretchy fabric.. they make for my fav refashions!
The V-neck part wasn't going to work on it's own for me, so I stitched it up about halfway. I still can't wear it without a modesty panel, but that's fine, it works for this style dress. I didn't get pictures of the process, but really it's very simple.

Here's the final result.


Ever so much better! I love it what just a buck can sometimes get me! I paired it with a nice little belt because the waist was just 'eh', and now it's more chic! I wore it out that very night for dinner with my Sunday School girls! (Yes, I know I have bruises on my lily white legs, I'm a klutz who avoids the sun like the plague, ok?) More refashions in the works, and I won't take so long next time!

Monday, February 3, 2014

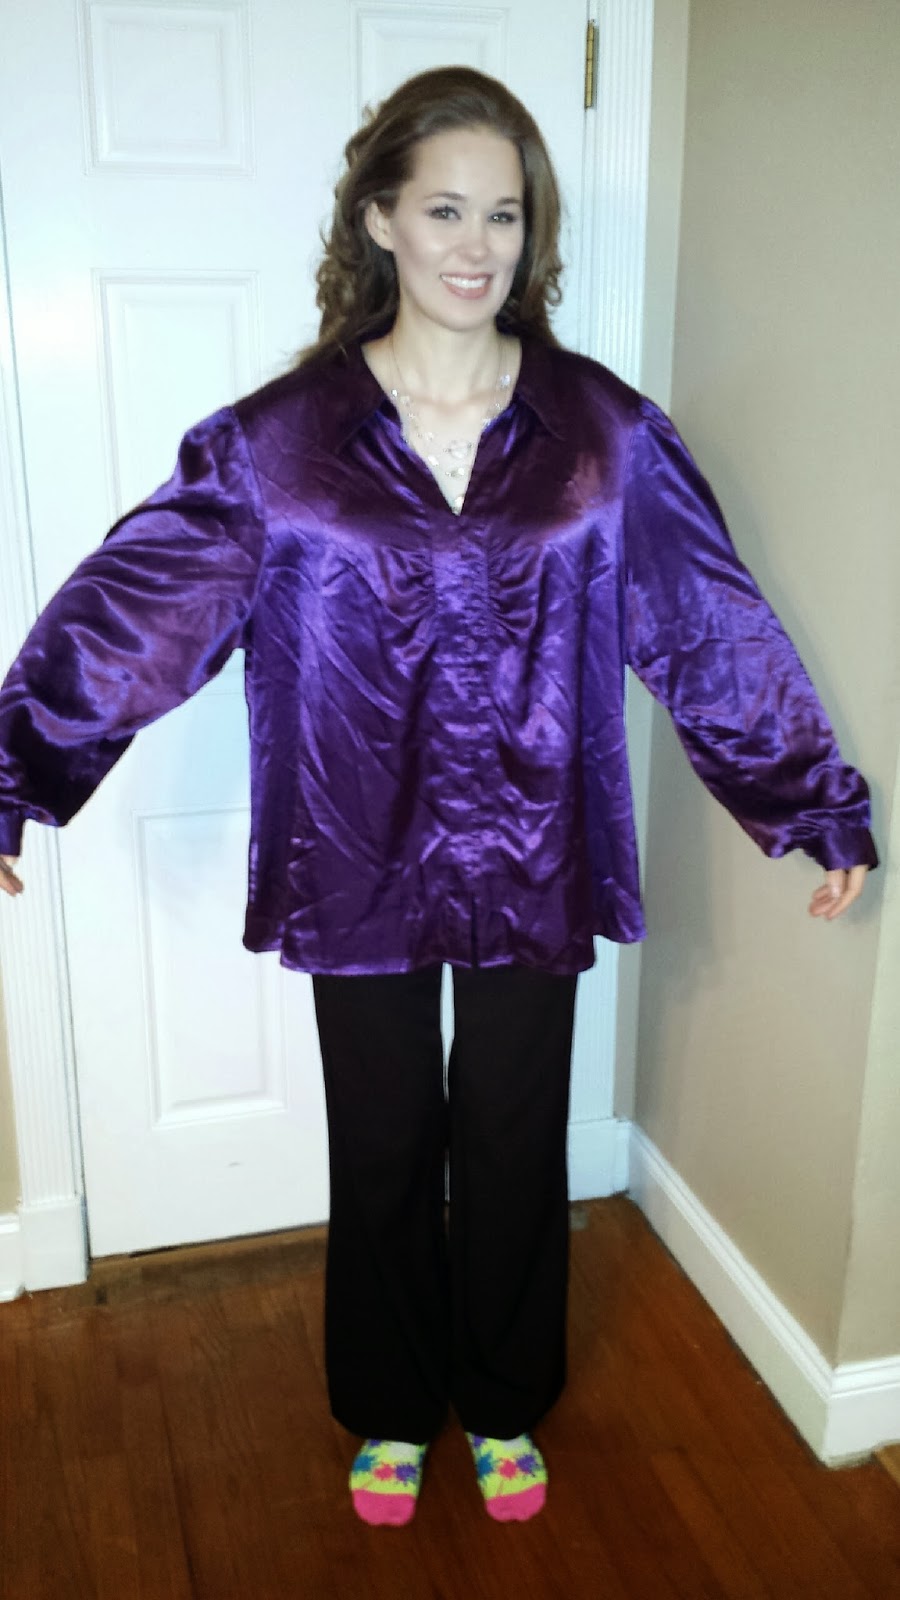
Purple! A big, $4 refashion.

I've wanted a purple blouse for quite awhile, and have never found one that I loved, that I was willing to pay for..... Even at my discount thrift store shopping. Until the other day, I ran into Goodwill quickly. I was on the verge of being disappointed in their knick knack section, and then occurred to me to search their sweaters for a good find. I have about three winter shirts that I have been rotating in this FL cold weather, and needed two or three more. I did find one nice sweater piece, with three-quarter length sleeves, and was quite happy with it. Then I found this:


I love my loud, obnoxious socks! But that blouse.. 26/28 X. However I was certain I could turn this into the beautiful royal top of my dreams. I took this pic at my parents house, you shoulda seen the look on my brother's face when he saw this. It was a, 'please tell me you're not wearing that in public?' look. I set his fears to rest immediately.

Took it home and got to work. I turned it inside out on my dressform, and pinned a rather loose fit. I'm tired of always cutting the fabric too short or too tight, and was determined to do it right this time. 
Then I chopped.


It was rather simple once I got past the fact that I would NOT be unbuttoning all those buttons everytime I wore this piece. I pinned both sides down and then tried to get it off my dress form, to no avail. I had to take the pins out of one side, and sew the other side first. I figured once the stitches were in place, it'd still come off the dress form when I pinned the other side. But when all's said and done, it was a very simple piece to make. Once the sides were sewn up, I carefully hemmed the sleevelines. The back of this top apparently scooped down lower than the front, and I didn't catch that at first, so the back was hanging down an inch or so lower than the front. Easy peasy, just make a hem and match the length of the fabric. I tried it on and made a tweak here and there, and then it was done. Pretty straightforward and simple, I probably finished in under an hour. Here is the finished piece.


A bit loose fitting, but I actually like it that way. It's comfy casual, and I LOVE the color!

Before and after:


Ta da!!  My $4 top! I did find another purple top at that same Goodwill hunt, and another very interesting piece that will be all kinds of fun and torture to play with! I will keep you posted!

Sunday, January 12, 2014

$1 Alterations!

Hello again! I have a whole pile of refashions waiting to happen! Thrift store shopping after Christmas is so much fun! My best find so far has been a beautiful porcelain doll (Name brand tag still attached) for $1.50 because it was half off day at Salvation Army! I absolutely love such good deals! 

Today's post isn't so much a refashion as it is a mere alteration. In fact, compared to some of my other refash's, these were a little bit on the boring side, so I'm including two before and after's, to make up for lost time a bit. Here is the first one. Found it at a mom and pop thrift store I'd never seen before.


Not a thing wrong with it, aside from being at least two sizes too large. Easy fix, really. Here is the altered top.


There's not a vast difference really, it's supposed to be a loose fitting top, but now it doesn't look miles too big. (Like my new 'do'?) I didn't get pics of the alteration process, there really wasn't much point. I took it in on the sides and put some darts on the chest. (I have considered adding some bead work to the neckline to add a little interest, but don't know if that would be too officey/middle aged? Thoughts?) I could always wear a long necklace with it...


Here is my second top, and this one is a little more interesting.


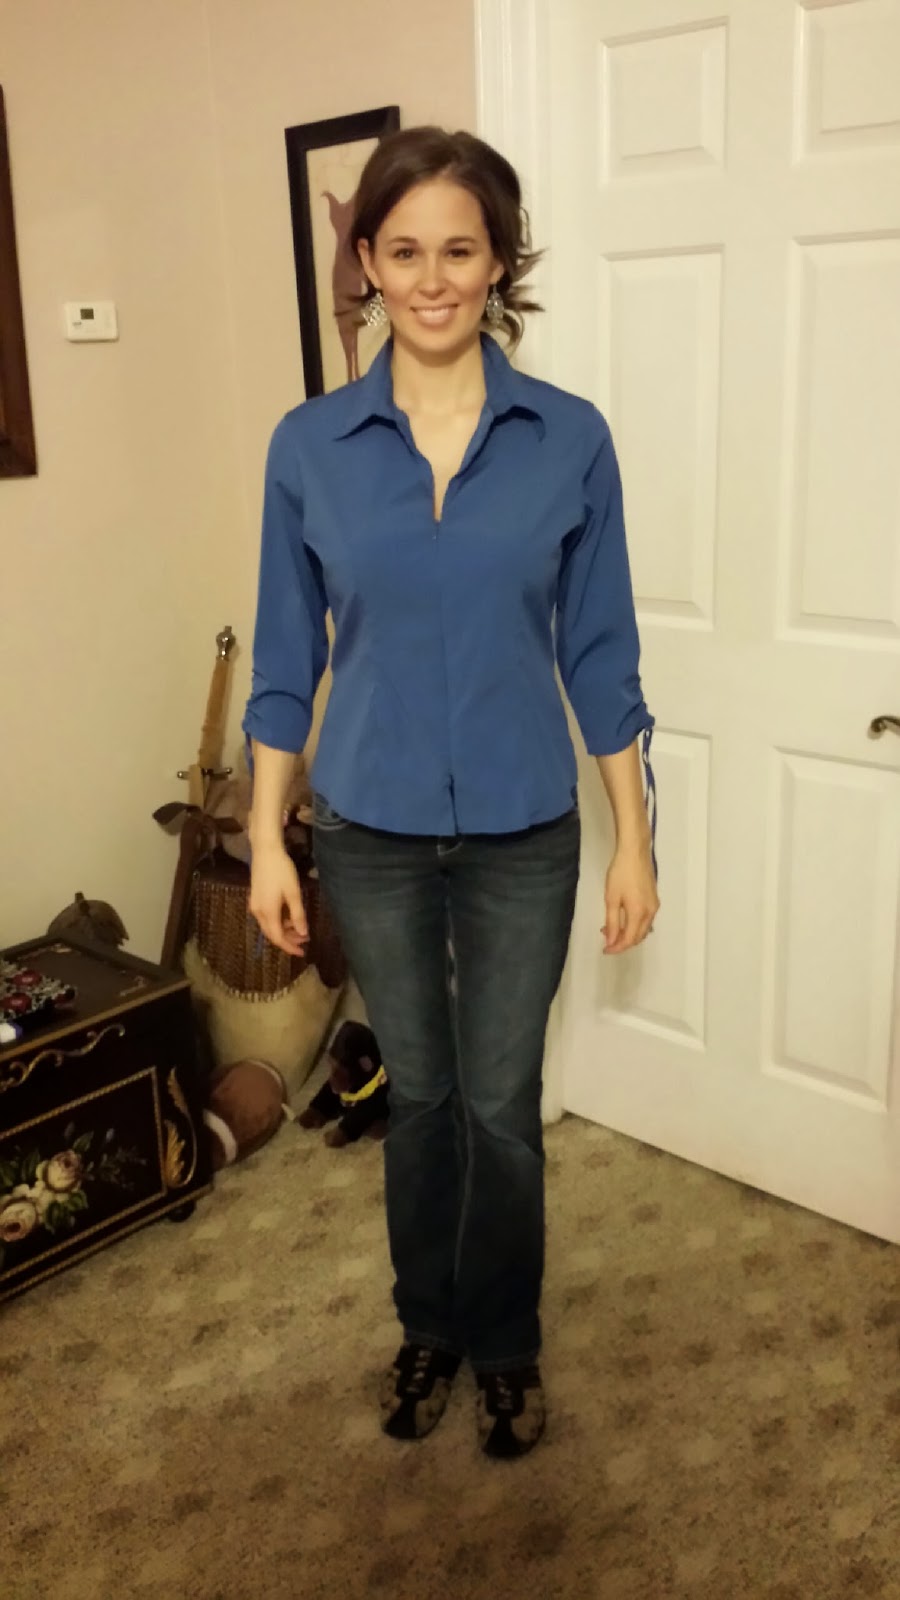
I really love all things blue! And needed a top that might be a bit more professional. Apparently blue is the color to wear to auditions, so this'll be great for a business role!
I don't know if you can really see the ribbon/string/cord things hanging from the sleeves? I suppose they were for tying into a bow, or a knot if you prefer, but I found it highly annoying, and didn't want them dangling off my arms all day. I tied them into a very tight knot, and turned the shirt inside out, pinned the cords inside the sleeves, sewed them down, snipped off the rest and voila! They will not be missed!

After pic


Much more better! More fitted, although it may not be so obvious in a picture, I can certainly tell the difference. I didn't have to put darts in this one, it kinda already had them, all I had to do was take it in on both sides by about an inch and a half on each side. 

So, two like new, beautiful blouses for $1 a piece! It really doesn't get better! 


Just for kicks and giggles, I'll show before and afters of my hair, since I got it cut this week.


I 100% prefer my hair long, and every time I get it cut I regret it, but I can't really do anything with it when it's that long. Maybe I just haven't found the right cut yet, haha.